This assembly guide describes the installation and configuration of the Logar beehive scale. It contains step-by-step instructions for commissioning, guidance on the correct positioning of the weight sensors, connection of the solar panel, and mounting examples. For other Logar products, such as Logar honey extractors, please visit our product pages.
To activate the scale, switch the power on.
The blue LED will begin to flash.
The scale will then log its first data within 2–3 minutes.
Measurements will appear in the web portal and the mobile app.
Measurements are taken hourly.
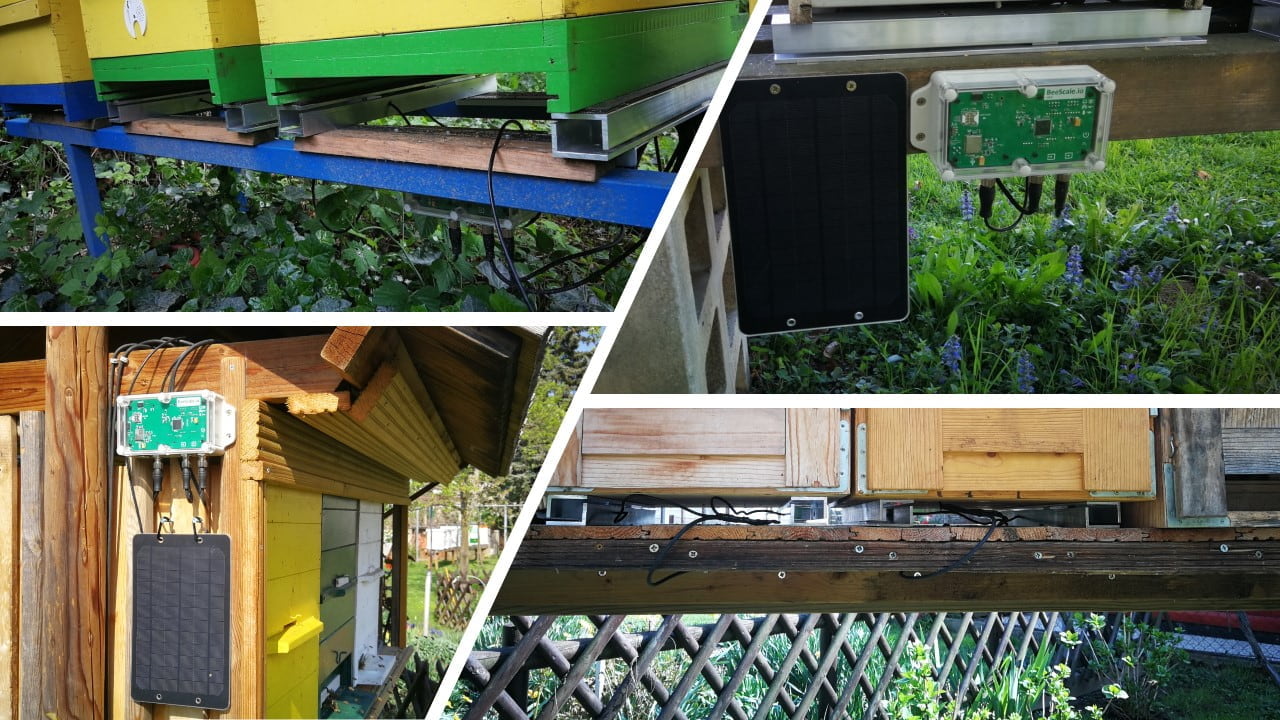
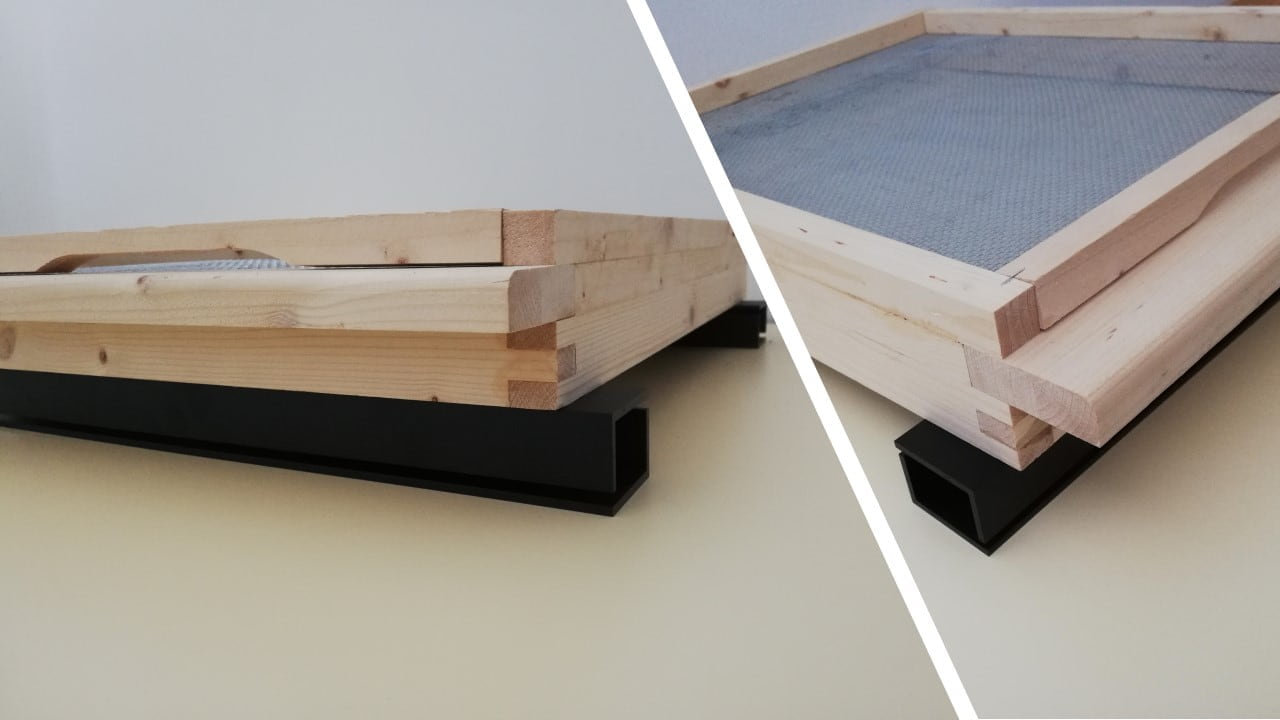
Mounting examples
Beehive scale mounting examples
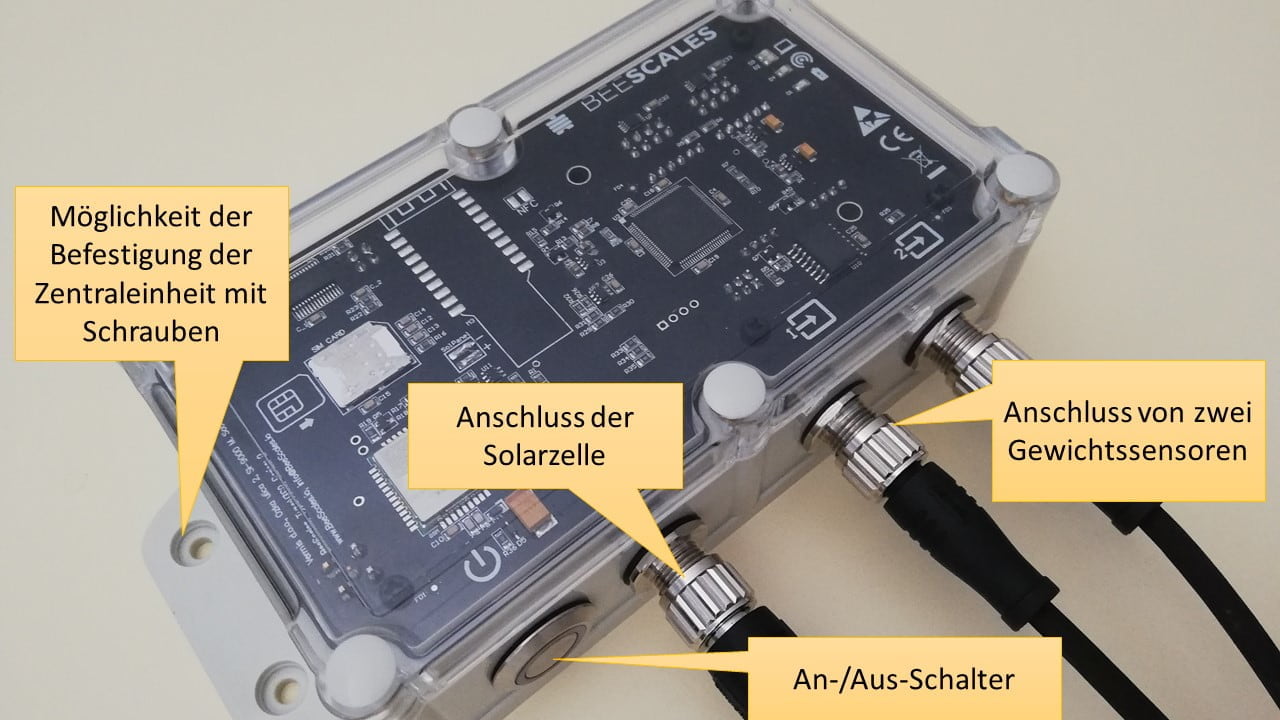
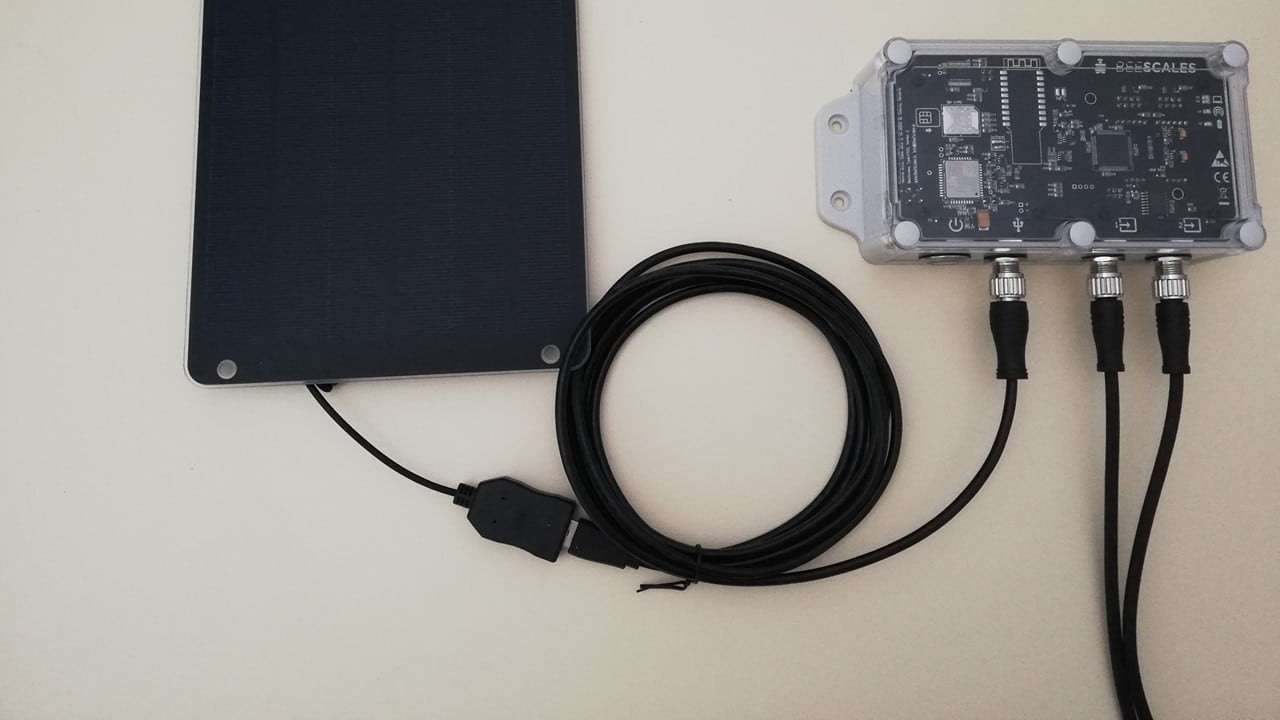
Central unit overview
Central unit overview
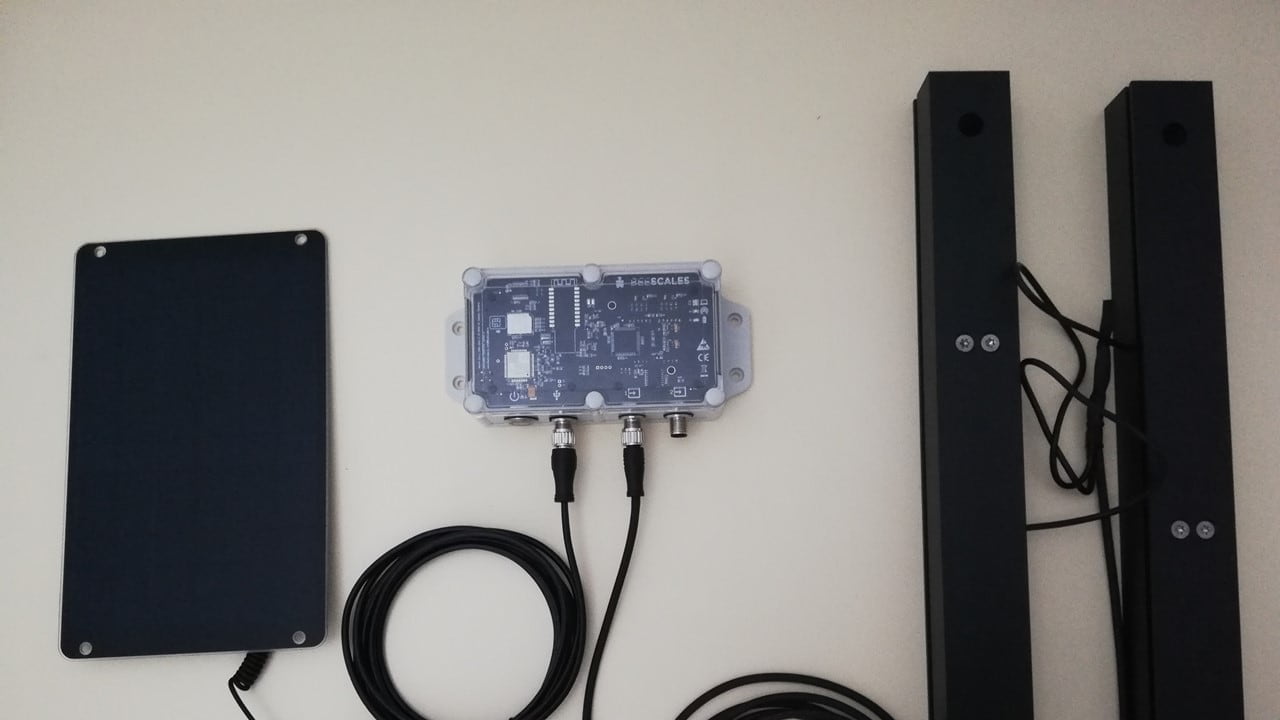
Configuration with a single weight sensor
Configuration with a single weight sensor
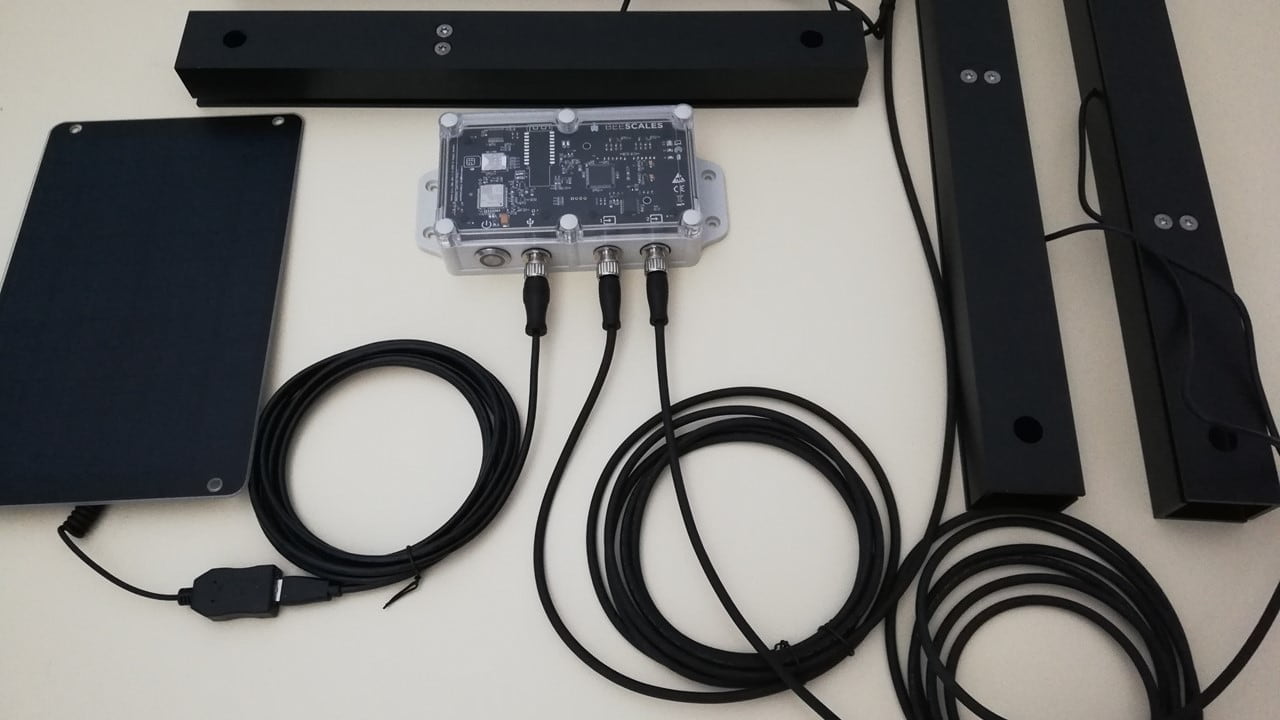
Configuration with two weight sensors
Configuration with two weight sensors
Connecting the solar panel
Connecting the solar panel
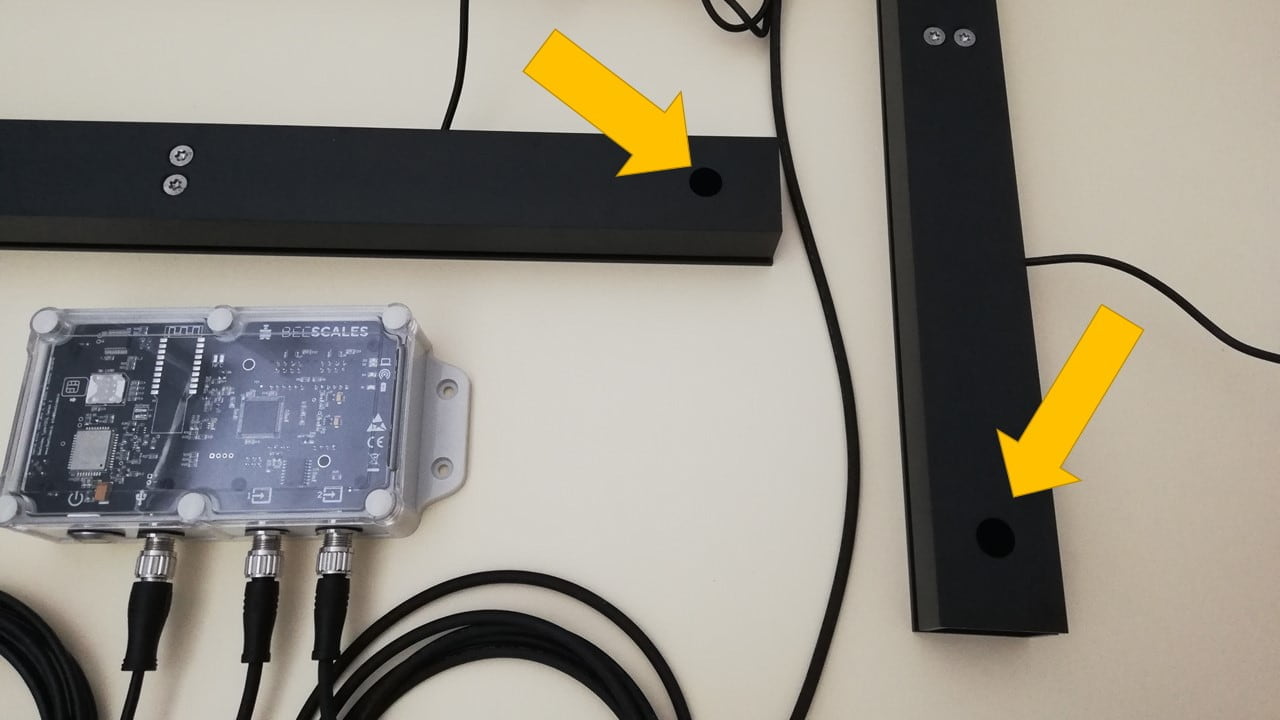
Correct positioning of the weight sensors
Correct positioning of the weight sensors
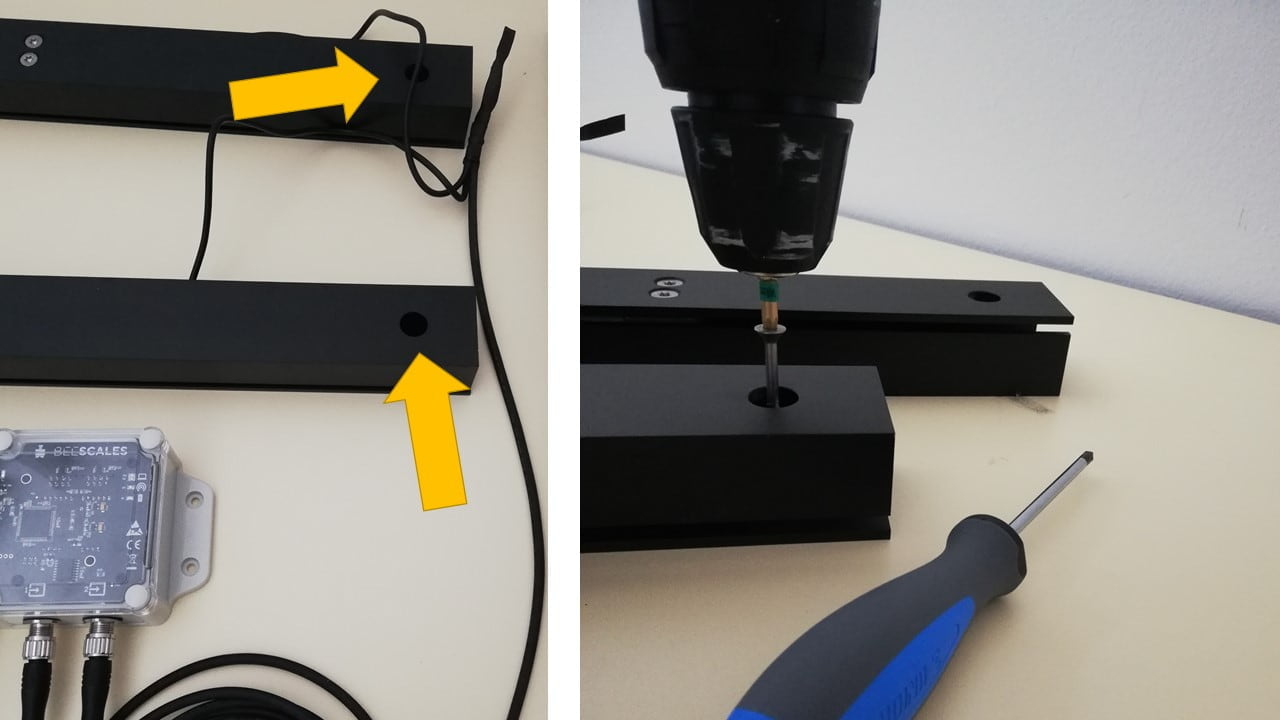
Secure the weight sensors to the surface if required
Secure the weight sensors to the surface if required